This is one of those inside-baseball posts, of particular interest perhaps to beginning and intermediate tapestry weavers. I've been weaving a tapestry with the working title
SkyGrass for several months now. Here's a view from the underside of the loom, where the tapestry has rolled under the breast beam.
 |
| detail, SkyGrass in progress, (c) Molly Elkind 2021 |
Here's the collage that the tapestry is based on. I am weaving it from the side.
 |
| SkyGrass collage (c) Molly Elkind 2020 |
When I started weaving, my first thoughts were, Dang, this is a lot of white! I would eagerly anticipate getting to each shard and blade of color, where I could enjoy the pleasure of color blending on the bobbin and in tapestry technique. Who designed this thing? Sigh.
And then, as I continued, I realized that this piece is really all about shapes--the shapes of the shards and grass, but also the shapes of the cutbacks (not seen on the collage but visible as dotted lines on the cartoon under the warp). The cutbacks are curved and straight lines of tiny slits that break up the expanse of white. I began to enjoy the challenge of trying to match in my weaving the angles of shapes and the cutbacks on the cartoon, and I realized that this was a good chance to improve my skills in this area.
I began to catch on that establishing a regular counted sequence of increases or decreases was key to making a line that the eye would read as smooth and regular. Another key was learning to let go of the exact line on the cartoon. Sometimes the grid established by sett, warp and weft simply does not allow us to make the exact angle we have drawn. Best to stick with the counted sequence in these cases, even if it doesn't match the cartoon. (The map is not the journey.) Luckily, with my design, there is some leeway for shifts in the lines and shapes.
 |
| detail, SkyGrass in progress, (c) Molly Elkind 2021 |
One of the first sequences I had to establish was the angle of the diagonal sides of the open-warp triangles. I settled on a simple move over by one warp with each pass, and decided the triangles would all have 15 open warps in the centers, from tip to base. Below is a detail of how the weft turns the corner and starts building up the top edge. At the tip of the triangle I cover the same warp with two passes, to make a more definite open space once it's all packed in place. If you're wondering what keeps those wefts from sliding down into the open area, the answer is careful fiddling with tension and gentle packing to keep them in place at first. Once more weaving is in place above the triangles they seem to stay put. Also, since I'm weaving this from the side, the warps in the finished piece will run horizontally rather than vertically. I chose not to use double half-hitches to secure those open areas because I didn't like the look in this case.
 |
| detail, SkyGrass in progress, (c) Molly Elkind 2021 |
Things get a little tricky when a number of shapes get close to or overlap each other. Here a blade of grass is cutting across an open triangle. It's especially fiddly to keep it in place. And I notice that the shape of the blade thickens where the wefts can spread out in the open warp area--I may need to go back and put in double half-hitches there.
 |
detail, SkyGrass in progress, (c) Molly Elkind 2021
|
It's been challenging to get some of the curved cutbacks to have just the right curves in the right places. Below I drew a black line showing where that curved cutback should have gone. I unwove that section and rewove it as you can see in the next photo.
 |
| detail, SkyGrass in progress, (c) Molly Elkind 2021 |
 |
detail, SkyGrass in progress, (c) Molly Elkind 2021
|
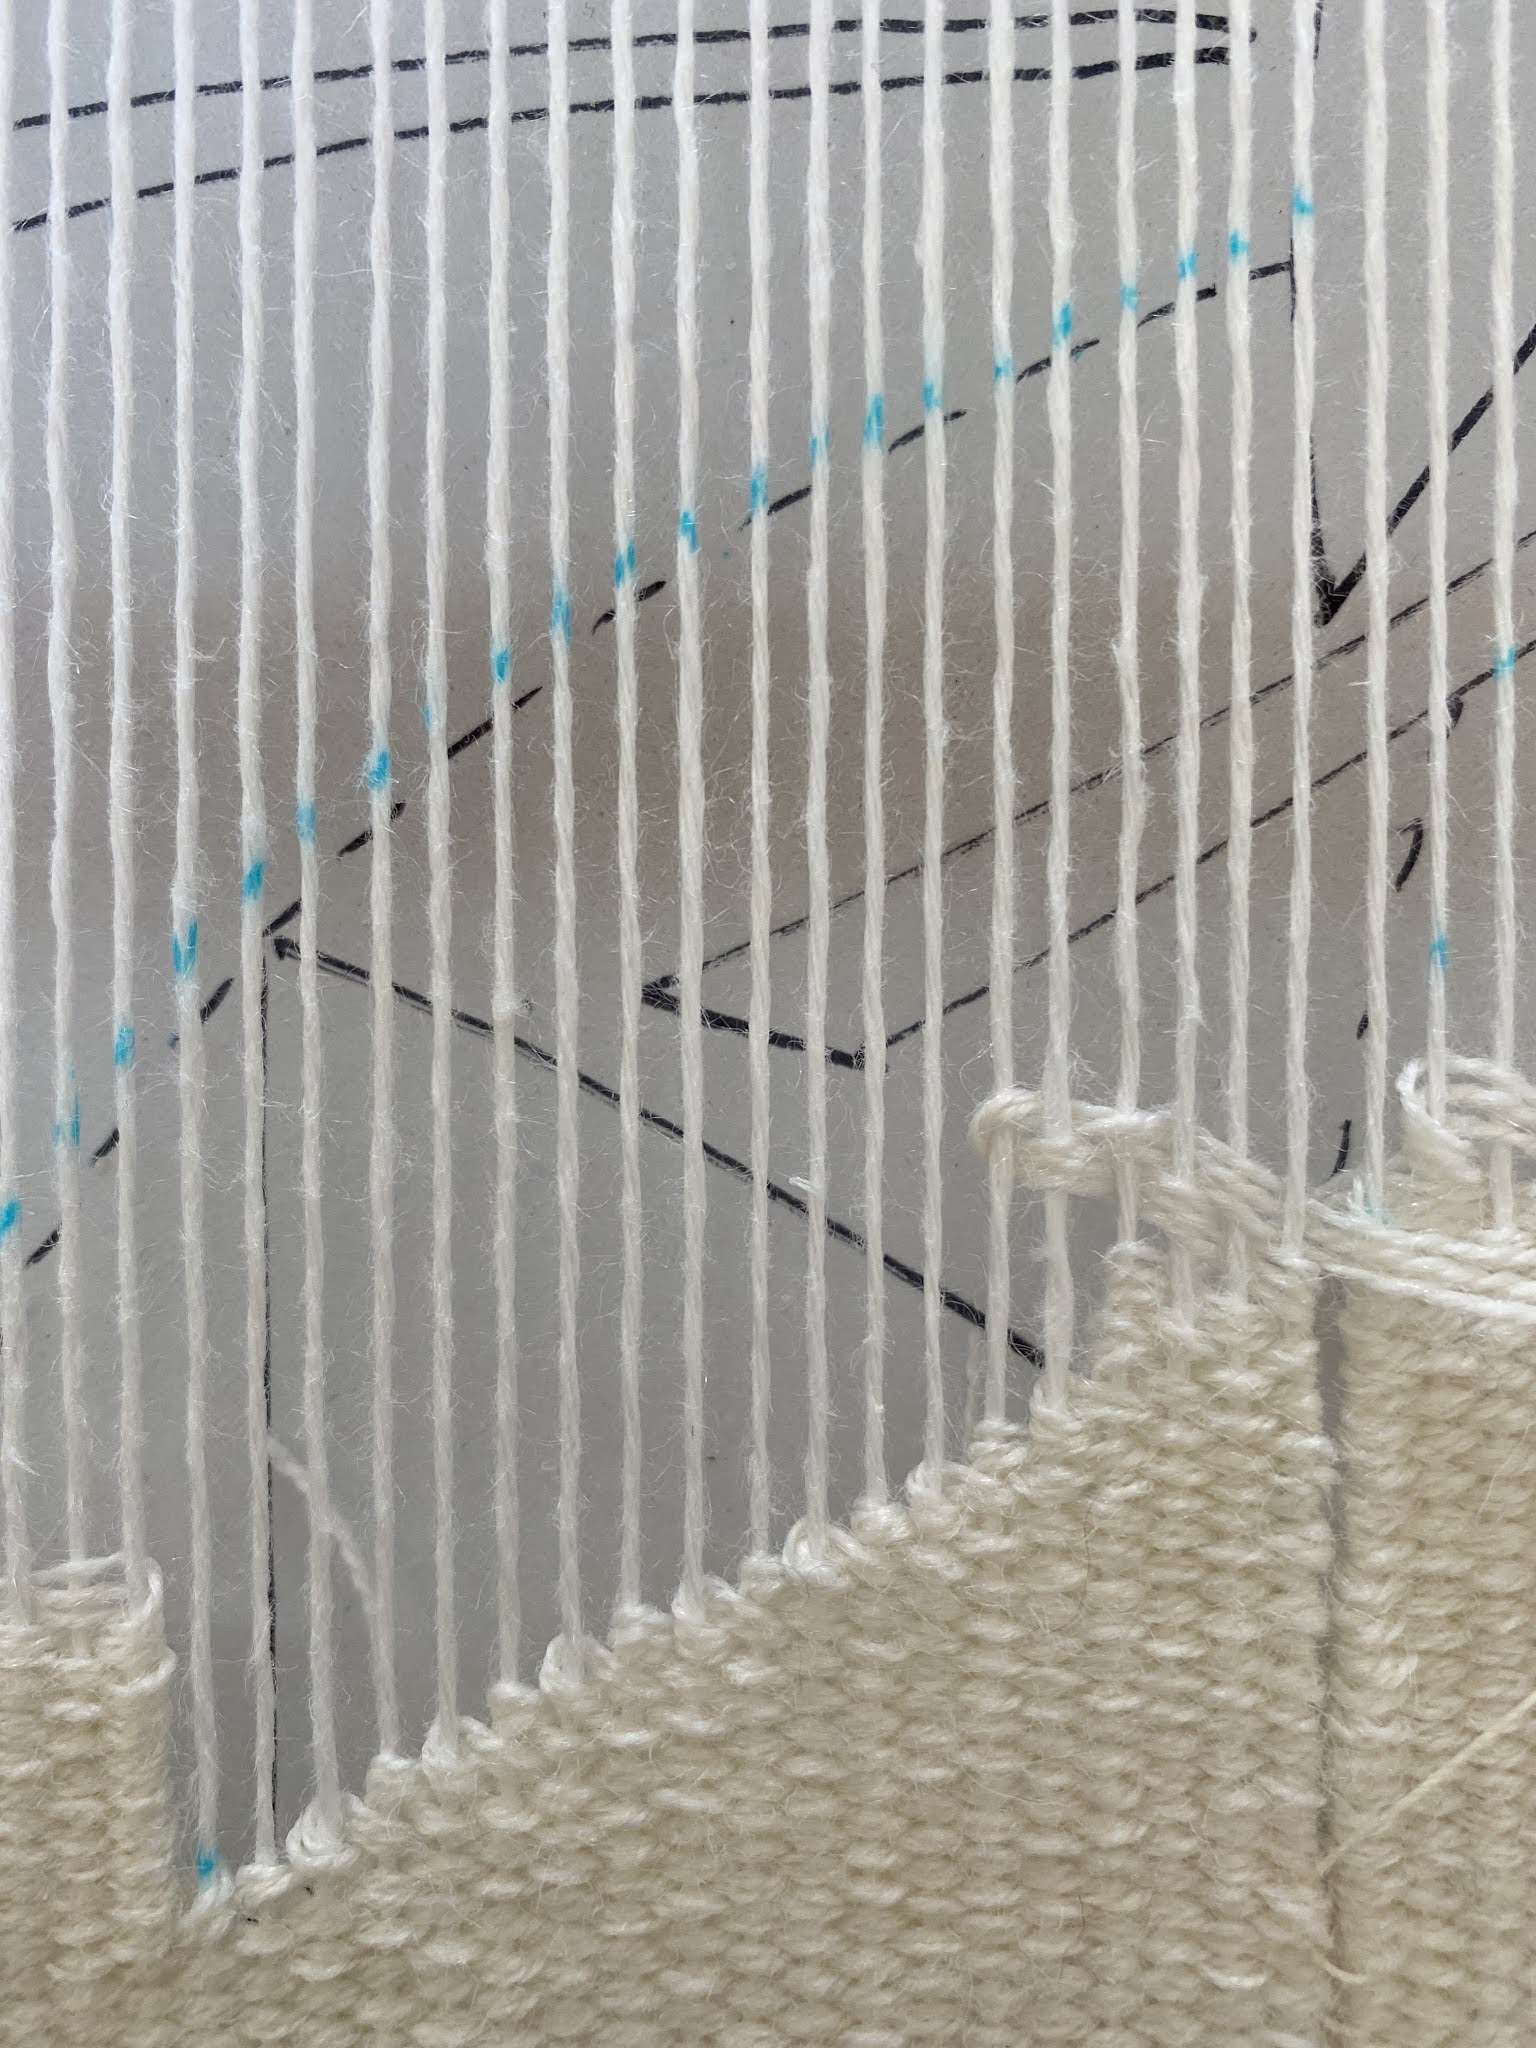
The regular sequence you establish for a curve at the outset usually needs to change as the curve gets steeper or more shallow. In the case of this shard shape below, I started the upward slope by moving over two warps with every pass. About halfway up, where you see the arrow, I switched to moving over one warp with each pass as the slope became steeper.
A word about the blue dots on the warp. I'm using a Mark-B-Gone pen whose ink washes out with plain water (available in the quilting notions section of the sewing store). I mark the warp when I need to and keep a small jar of water and a clean paintbrush handy to remove the dots as I get to them. (Or past them, as the case may be.) No way I'm going to use a black sharpie on a white tapestry!
 |
detail, SkyGrass in progress, (c) Molly Elkind 2021
|
 |
detail, SkyGrass in progress, (c) Molly Elkind 2021
|
I'm about two-thirds finished with this piece and hoping to cut it off by mid-May. Stay tuned!